Tuesday, April 20, 2021

Healing Hugs Get Well Soon Card

Hi Stampers!

Happy Monday all...not sure how they get here so fast, but here we are with another one. (Actually, it technically has officially past and is Tuesday morning)  I really need to stop being such a night owl! 😑😳  I recently shared this Healing Hugs Get Well card with my stamp club. I just love this stamp set. It is a distinktive stamp set which means it stamps images that show 3D detail. It stamps the most realistic looking flowers! For club we made them in purple (that is my favorite color, after all). But I had tried several colors before deciding on the purple. In fact, to be fair, I asked my hubby to choose the best color and he chose purple. I don't know, but all these years of being surrounded by purple may have rubbed off on him.  There are several items in this card that are on the retiring list, and I am sad about them all.  The Purple Posy paper is a retiring In Color, the Healing Hugs stamp set, and the Peacock Jewels retired last year.

                                
For the card front, we used what I call a Peek-a-boo fold as the fold allows the sentiment to peek out from the layer below. It is super easy to make. I started with a Gorgeous Grape card base and the DSP from the In Good Taste in a light neutral color woodgrain look. The DSP is a 5 1/4" by 4" piece that is cut in the center of the longer side at 2 5/8" and you cut down to the 2" mark (basically to the halfway point). Then you fold back to the two flaps that are made by the cut and place a mini glue dot behind to hold them down. I then dry fit this over a Basic White panel and penciled an outline lightly so I would know where to stamp my sentiment. I stamped the Get Well Soon stamp from the stamp set in Gorgeous Grape ink. I then erased my pencil marks and adhered the DSP to the Basic White panel and then to the card front. I next stamped the flower from the same set in Gorgeous Grape ink on a scrap of Basic White; I also stamped two leaves in Shaded Spruce ink. I fussy cut these things out with Paper Snips and adhered the leaves to the back of the flower with mini glue dots and then the flower onto the card front aligning to the left of the sentiment over the center cut with dimensionals. 


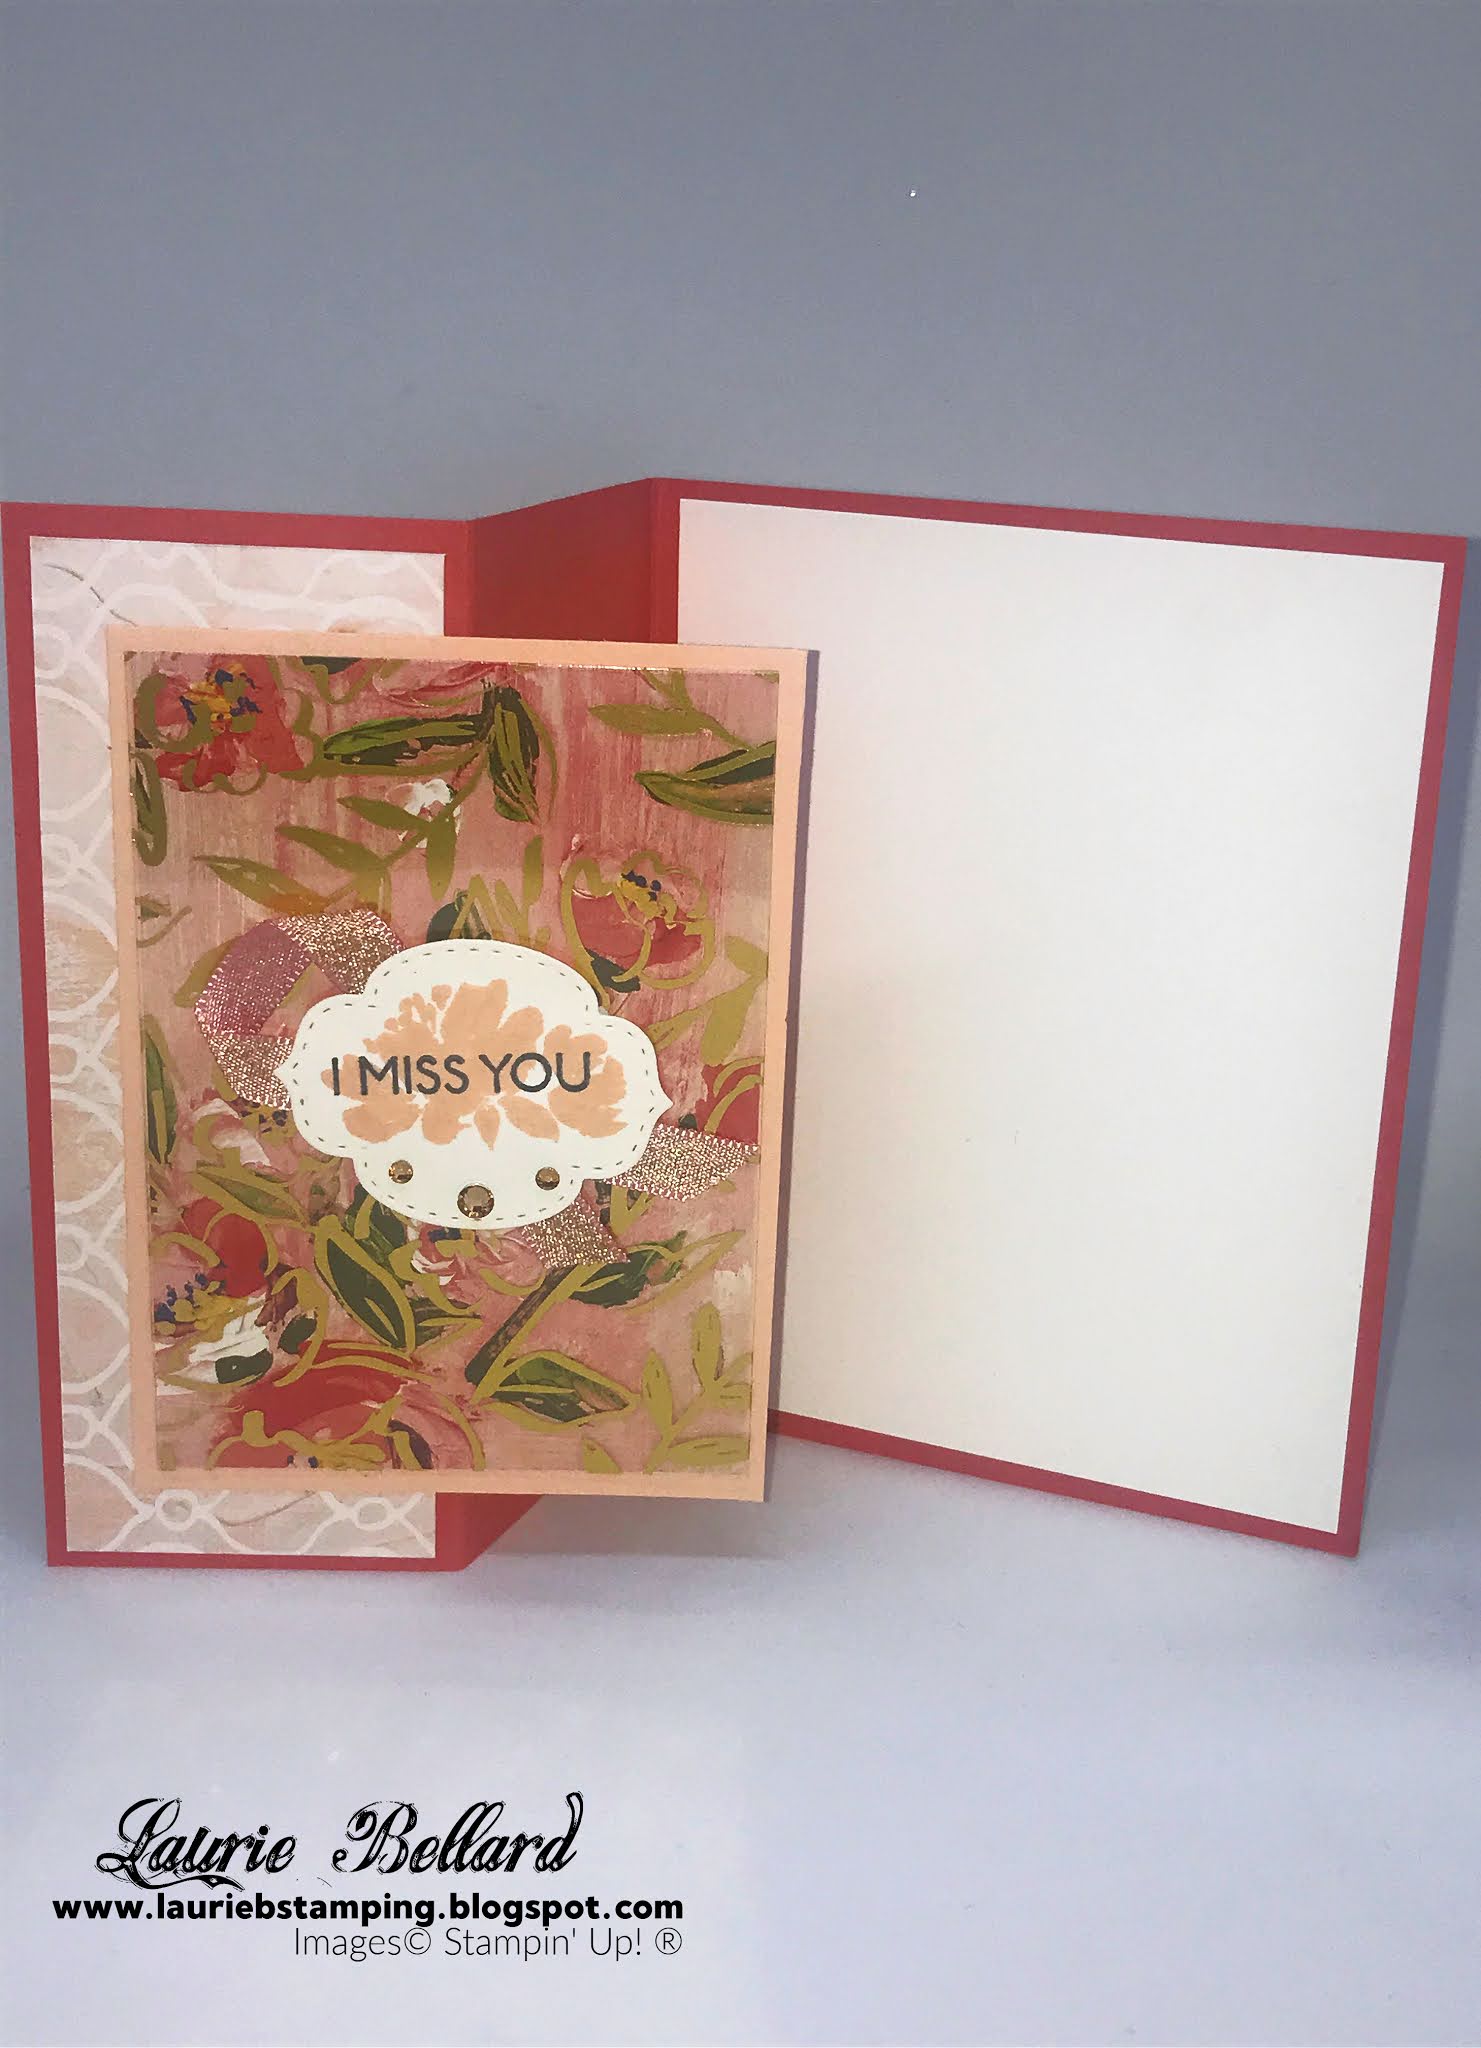
For the card inside I stamped the upper left corner of a Basic White panel in Gorgeous Grape ink, going off the edge. I stamped the sentiment from the same stamp set in the center. I adhered this panel to a Purple Posy mat and then into the card inside.

For the envelope, I stamped the flower again on the lower left of the envelope front in the same ink color and glued the same In Good Taste DSP on the envelope flap and trimmed the excess with Paper Snips. And just like that, and gorgeous card to send to anyone that is feeling under the weather! Here is a picture of all the various card colors I tried; Calypso Coral and Melon Mambo were the other two besides the Gorgeous Grape color. Which one is your favorite?

                          
If you want to recreate this card, here are the measurements and supplies I used.  If you need any supplies you can click on the item to be taken straight to that item in my online store to shop with me for whatever you need.  

Cardstock & Designer Series Paper & Ribbon:
Gorgeous Grape Cardstock – 5 ½” x 8 ½”, scored at 4 ¼” - card base
Purple Posy Cardstock – 1@ 5 3/8” x 4 1/8” card inside mat
In Good Taste DSP – Light woodgrain – 1 @ 5 ¼” x 4” – card front mat; 2 ¼” x 6” – envelope flap
Whisper White cardstock – 1 @ 5 ¼” x 4” – card inside; 1 @ 5 3/8” x 4 1/8” – card front mat; 4” x 2” – Flower & Leaves


If you live in the United States and don't already have a demonstrator, I would love to help you with your crafting needs.  If you need a catalog, you can select the contact me link in my blog header above and I will get you one in the mail.  If you would like to receive email notification each time I have a new blog post, sign up via my email link on the right sidebar.

Until next time...
Happy Stamping!
Laurie B.


Friday, April 16, 2021

  Hi Stampers!

Here is the final card from my weekend YouTube Premier video from Saturday.  It is the Best Wishes card using the Art Gallery bundle and suite.   


I started with a Pool Party card base and adhered a Night of Navy mat to both the card front and the card inside.  I used some of the Fine Art Floral DSP in that gorgeous muted Pool Party stucco paint pattern and layered that next on the card front.  I placed the silver side of the quatrefoil pattern Golden Garden Acetate face up, and used mini glue dots strategically placed behind the flowers on the front and behind the silver designs in the corners. For the details on how I stamped all the flowers for the card front and put it all together, check out the YouTube Video link here, starting at the 47:58 minute mark:

For the card inside, I stamped another flower in the same colors as above in the lower left corner of a Basic White panel and adhered it with glue.  I did not stamp a sentiment on the card inside as I wanted to leave room to write a personal note, but you could totally stamp a sentiment if you prefer.    


As part of this class video I did not stamp the envelope, but before I send it out I will stamp the same flower as I did on the card inside, to the lower left corner of the envelope front and use some of the same Pool Party stucco pattern Fine Art Floral DSP for the envelope flap. Just can't send a naked envelope after working so hard on the card; that would just be wrong! 😉 

If you want to recreate this card, here are the measurements and supplies I used:

Cardstock & Designer Series Paper & Ribbon:
Pool Party CS – 8 ½” x 5 ½”, scored at 4 ¼” - card base
Night of Navy CS– 2@ 5 3/8” x4 1/8”–card front & inside mats
Basic White CS–1@5 ¼”x 4”–card inside;1@3½”x11”– flowers & sentiment
Fine Art Floral DSP – 1@ 5 ¼” x 4” – card front; 1 @ 2” x 6” – envelope flap
Golden Garden Acetate – 1 @ 2” x 5 ¼” – card front


Product List:
Hope you enjoyed the cards in this class.  I really LOVE this set and holding 3 different classes gave us all an opportunity to get lots of ideas and really use it to its fullest potential.  Hope you enjoy making the card!  If you like this video and cards, let me know.  I love sharing what I do and hearing how others use these ideas to create their own ideas.  That is just the best...sharing ideas!

If you live in the United States and don't already have a demonstrator, I would love to help you with your crafting needs.  If you need a catalog, you can select the contact me link in my blog header above and I will get you one in the mail.  If you would like to receive email notification each time I have a new blog post, sign up via my email link on the right sidebar.

Until next time...
Happy Stamping!
Laurie B.

Wednesday, April 14, 2021

Art Gallery Miss You Card

  Hi Stampers!

Here is card #3 from my weekend YouTube Premier video from Saturday.  It is the I Miss You fun fold card using the Art Gallery bundle and suite.   


I started with a Terracotta Tile card base and some of the Fine Art Floral DSP and the gorgeous coordinating Acetate that goes along with the suite.  I scored the card base at 4 1/4" and 2 1/8" and folded the card in half and then folded back the other score line. I adhered the more muted piece of DSP to the small card flap, and a Basic White panel into the card inside.  I aligned the acetate that coordinates to the pretty floral DSP pattern and strategically placed mini glue dots behind leaves on the silver side of the acetate to they would be hidden.  I adhered this on the Petal Pink CS panel and placed glue on the left side of the back of the panel only and then centered it on the small flap over the DSP.  

I stamped the small flower from Art Gallery stamp set in Petal pink ink and stamped the I Miss You sentiment in Tuxedo Black Memento ink over the center of the flower.  I then cut this out using the Stampin Cut & Emboss machine (SCEM) and the next to the smallest tag die from the Stitched So Sweetly die set.  I folded the ribbon in half and placed it behind the sentiment at an angle and placed that in the center of the card front using Stampin' dimensionals.  I placed three Champagne Basic Jewels under the sentiment.

To see how I pulled the card all together, you can check out my YouTube video here starting at the 17:31 minute mark:


As part of this class video I did not stamp the envelope, but before I send it out I will stamp the same flower as I did on the card inside, to the lower left corner of the envelope front and use some Fine ArtFloral DSP for the envelope flap. You know I can't send a plain ugly envelope with a gorgeous handmade card! 😉 If you want to recreate this card, here are the measurements and supplies I used:

Cardstock & Designer Series Paper & Ribbon:
Terracotta Tile CS –8½” x 5 ½”, scored @4 ¼” and 2 1/8” card base
Petal Pink CS – 1 @ 3 ¼” x 4 ½” – card front background mat
Basic White CS – 1@5¼”x4”–card inside; 1@2½”x2½”–Card front sentiment
Fine Art Floral DSP – 1 @ 3” x 4 ¼” – card front background mat; 1 7/8” x 5 ¼” – front flap background mat
Golden Garden Acetate – 1 @ 3” x 4 ¼” – card front mat overlay
Blushing Bride 3/8” Metallic Ribbon – 6”

Product List:

If you live in the United States and don't already have a demonstrator, I would love to help you with your crafting needs.  If you need a catalog, you can select the contact me link in my blog header above and I will get you one in the mail.  If you would like to receive email notification each time I have a new blog post, sign up via my email link on the right sidebar.

Until next time...
Happy Stamping!
Laurie B.